Assembling a new massage chair can seem like a daunting task, but for most models, the process typically takes between 30 minutes to 2 hours. The exact duration depends on the complexity of the chair’s design, the number of components, and whether you have assistance. Understanding what to expect can help you prepare for a smooth setup and get to relaxing faster.
Understanding the Assembly Process
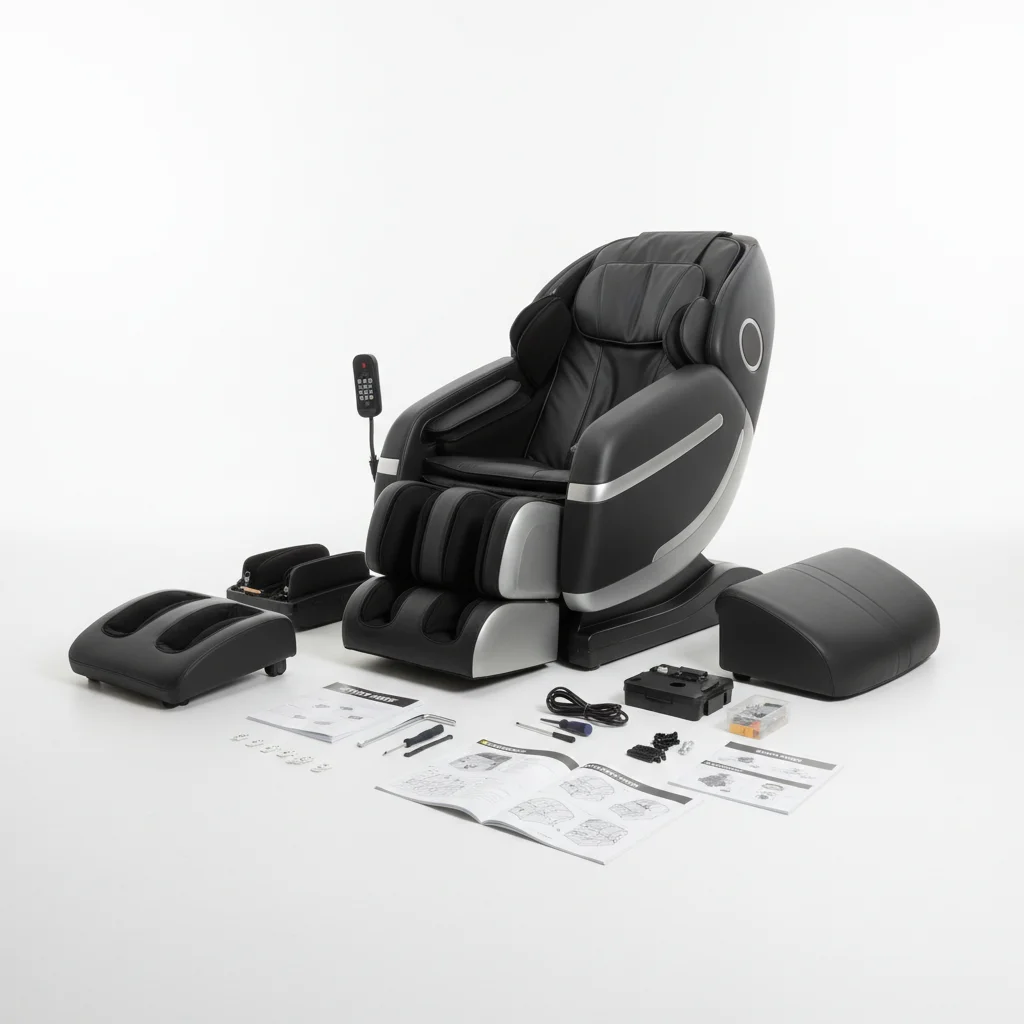
Most massage chairs arrive in several large boxes, with the main body often pre-assembled. The primary tasks usually involve attaching the leg rests, armrests, and sometimes the side panels or remote control holder. Manufacturers design these chairs with user-friendly assembly in mind, often providing clear, step-by-step instructions and all necessary tools.
Some premium models might have more intricate wiring or require connecting air hoses for advanced features like air compression massage. However, even these more complex setups are generally designed to be manageable for the average consumer. Always review the instruction manual thoroughly before beginning.
Factors Influencing Assembly Time
Several factors can impact how long it takes to assemble your massage chair. The brand and model play a significant role; simpler chairs with fewer features will naturally take less time than high-end models with extensive functionalities. Having a second person to help can drastically reduce assembly time, especially when maneuvering heavy or bulky components. Additionally, ensuring you have enough clear space to work in and access to a power outlet for testing will streamline the process.
- Complexity of the chair model (e.g., 2D vs. 4D, zero gravity features)
- Number of individual components to attach
- Availability of a second person for assistance
- Clear workspace and proper lighting
- Familiarity with basic tool usage
Tips for a Smooth Assembly Experience
|
Our Picks for the Best Massage Chair in 2026
As an Amazon Associate I earn from qualifying purchases.
|
||
| Num | Product | Action |
|---|---|---|
| 1 | COMFIER Shiatsu Back Massager with Heat, Dual Motor 3D Rollers, Long Track Deep Tissue Kneading, Foldable Massage Chair Pad with Adjustable Height for Back Tension & Muscle Stiffness |

|
| 2 | Mynt FSA Eligible HSA Approved Shiatsu Neck and Back Massager for Chair with 10 Deep Kneading Nodes, 2D & 3D Back Massage with Heat, Portable Spot Massage Chair Pad (Black) |
|
| 3 | Snailax Shiatsu Back Massager with Heat Massage Chair Pad Kneading Back Massager for Pain Relief Deep Tissue Chair Massage Pad for Office Home |
|
| 4 | Snailax Neck Back Massager with Heat, Full Body Massage Chair Pad, Adjustable Compression, Rolling, Shiatsu Massage Seat Cushion, Chair Massagers,Gifts for Women, Man (Upgrade) |
|
| 5 | belhope Shiatsu Neck and Back Massager with Heat, 4D Kneading Back Massager for Pain Relief Deep Tissue, Comfortable Back Massage for Chair, Massage Mat for Home, Mother's Day Gifts for Men Women |
|
| 6 | COMFIER Shiatsu Neck & Back Massager with Heat, Full Back Coverage Massage Chair Pad with 4D Kneading & Adjustable Neck Nodes, Waist & Hip Compression |
|
| 7 | COMFIER Massager Chair with Heat, Shiatsu Neck Back Massager Portable with Compression & Rolling,Massage Chair Pad for Neck & Back for Muscle Tension Relief |
|
| 8 | Snailax Shiatsu Neck Back Massager with Heat, Massage Chair Pad with Compression, Height-Adjustable Neck Massage Rollers Chair Seat Massager, Gifts for Men, Women |
|
| 9 | Lvrunben Shiatsu Back Massager with Heat, 3D Kneading Massage Chair Pad, Electric Massage Seat Cushion for Body, Neck,Shoulder, with Movable Multi-Function Leg and Foot Massager, for 62-69 inches |
|
| 10 | Snailax shiatsu Neck & Back Massager with Heat, Full Back Kneading Shiatsu or Rolling Massage, Massage Chair pad with Height Adjustment, Back Massager for Neck and Shoulder |
|
Before you even open the boxes, clear a large area in the room where the chair will ultimately reside. This prevents the need to move the chair after assembly, which can be challenging due to its weight. Unpack all components and lay them out, comparing them against the parts list in the manual to ensure everything is present. It’s also a good idea to have a screwdriver set handy, even if the chair comes with its own basic tools, as your own might be more comfortable to use.
Follow the instructions precisely, taking your time with each step. Rushing can lead to mistakes or damage. If you encounter any difficulties, refer to the troubleshooting section of the manual or contact the manufacturer’s customer support. Many brands also offer online video tutorials that can be incredibly helpful. Remember, proper assembly ensures the chair functions correctly and safely for years to come.
What to Do After Assembly
Once your massage chair is fully assembled, perform a quick check to ensure all connections are secure and all parts are firmly in place. Plug in the chair and run a short test program to verify that all functions, such as recline, massage rollers, and heat, are working as expected. This initial test helps identify any issues before you settle in for a long session. Don’t forget to register your product for warranty purposes, a crucial step for long-term peace of mind.
Enjoy your new massage chair! It’s an investment in your well-being, and a little effort in assembly will pay off with countless hours of relaxation and therapeutic relief.Consider adding a protective mat underneath to prevent floor scratches, especially if you plan on moving the chair frequently.
Get our weekly buyer guide
Practical specs, not advice. Unsubscribe anytime.
After a long day, all I want is to relax, and this chair delivers. I was dreading the assembly, thinking it would be an all-day project. But with the main body mostly pre-assembled, it was just a matter of attaching a few parts. I had it ready to go in under an hour, which was a pleasant surprise. Highly recommend for anyone looking for quick setup and quick relief.
I got a mid-range model, and while the main body was pre-assembled, I found connecting the side panels a little fiddly. The instructions were mostly good, but one part of the diagram for the side panel attachment wasn’t super clear. It took me a bit longer than the 30 minutes to 2 hours estimate, probably closer to 2.5 hours. Still, it works great now that it’s done.
I was so worried about putting together my new massage chair, especially after reading about some of the more premium models with intricate wiring. But honestly, it was way easier than I thought! The instructions were super clear, and I had it mostly done in about an hour and a half, just like it said it might take. Definitely worth the small effort for the daily relief.
My chair arrived in those several large boxes, and I was a bit intimidated at first. Attaching the leg rests and armrests was straightforward enough, and I appreciated that all the necessary tools were included. It took me closer to the 2-hour mark because I took my time, but it wasn’t a nightmare. Now I’m enjoying the air compression massage every evening.